
A Primer on Ribbed Baskets: or weaving upside down
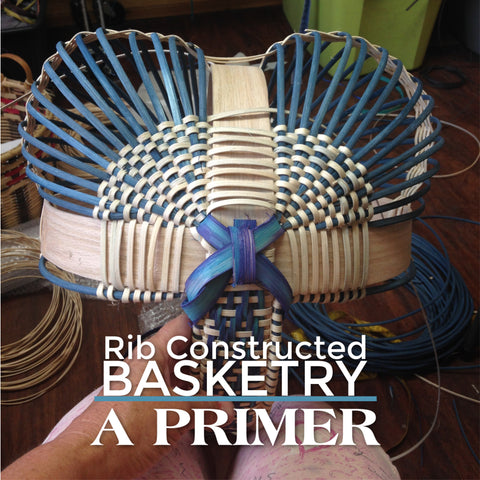
Rib baskets are like twill baskets you either love them or eh....not so much.
We've talked a lot about the different ways you can lash hoops together in other blog posts but what about getting those ribs into the lashing.
I've used lots of different mediums in rib constructed basketry including willow, carved oak, and rattan reed. There ALL wonderful and have their own idiosyncrasies but for our purposes let's focus on rattan reed.
The best thing about rib constructed baskets? You weave them upside down with the handle in your lap.

What size ribs should you use?
- The first thing to consider is how big are the hoops. 14" diameter hoops need something a little stronger like #6 RR for ribs. 10" diameter hoop you can with something smaller like #5 RR for ribs. I also like to use 1/4" oval/oval for ribs on some designs. The only way to find out is to experiment and decide HOW MANY times you want to add ribs.

How do I make ribs STAY in?
- The first thing I say to students about ribs is that they are PLACED not inserted deep into the ear (lashing) of the basket.
- The first set of ribs can be trying. Remember to use an awl to make a hole for them to go in FIRST. Then add the rib.
- A good rib has a good slype (long tapered cut). A blunt cut on a rib will not stay in and you will wonder why you decided to make a rib constructed basket soon into the process if you don't take the time to make good cuts (slype) on your ribs.
- When you add a rib make sure you add the cut side NEXT to the existing rib. They stay in a lot easier when you insert them this way.
- Give those first ribs once inserted a LIGHT misting with warm water. That helps make the ribs expand and hold tighter until you can weave them into place.
- With that said a wet weaver is a wonderful thing a wet basket is NOT! If you get over excited by using the spray bottle your ribs will get wet and supple NOT what you want to achieve. The basket shape will soon be compromised.
- Three rows of weaving are needed to hold a newly inserted ribs. When I say three think like a windshield wiper, 1 to the right, 2, to the left, 3 to the right. NOT to the right and back equals 1 row of weaving.
- You want to add ribs as quickly as possible with the minimal amount of weaving in between adds.
![]()
Adding the second set of ribs:
- Make sure you ADD ribs in an even amount. This does not mean you count the amount of ribs and find that there is an odd amount and think I've made an error. It's the amount that's ADDED at one time not the amount that is in the basket.
- With that being said you can add an ODD amount IF one of those ribs is by the hoop of the basket and you FINISH the row not start it. Why does this work? Once you hit the rim of a basket it's like you have a clean slate as far as the weave of the basket goes.
- When you add always add with the CUT edge NEXT to the existing rib (I know I said this before but it's worth repeating).
- When you add ribs keep them all to the right or all to the left so they are easier to see. Add ribs on each of the existing ribs.
- Want a great shape? Measure the stakes for one side of your basket and make them match those measurements on the other side. Brilliant huh?
- A great way to make weaving those "doubles" (ribs with an added rib next to it) into "singles is to weave for 2 rows like you haven't added them. This secures the ribs better so that when you weave 3 and row as all singles it's much easier to do so.
- Remember ribs are PLACED they are not shoved down for 2 inches into the basket.
To be continued.....

BLOG POSTS on LASHING:
BLOG POSTS on RIB CONSTRUCTED BASKETS:
- 6 EASY VIDEOS to weave the Herb Drying Basket
- It's on your Bucket List to weave
- Talking a "Blue Streak" about the BLUE STREAK BASKET
1 comment
You do beautiful work and I am excited to be following you. I saw some photo’s on the Josephine Knot basket and am wondering if you have a pattern. Thanks